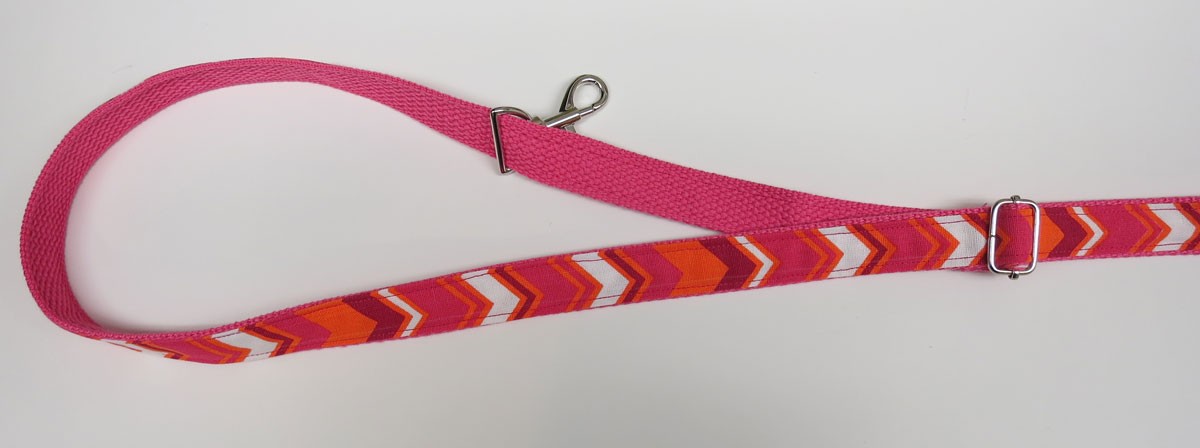
Sliders or Strap Buckles are used when you need an adjustable strap for shoulder bags, cross body bags, back packs, and more, and they make using any bag far more convenient.
Attaching a Slider to your strap and bag, and getting the buckle on the strap so it slides easily can be an exercise in frustration. It can seem like an Indian rope trick the first time you try it.
Follow these easy steps to stay tangle free and get the most use out of your bag!
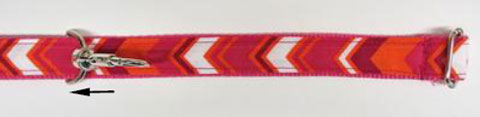
Step 1: Measure your bag strap
Measure your strap to find its width. Typically straps are ¾”, 1″ or 1 ½” wide when using a pattern purchased at a quilting shop.
You’ll need to purchase a Slider of the same width as your strap.

Sliders can have a moveable center pin or they may be fixed. Either style is fine for the job.
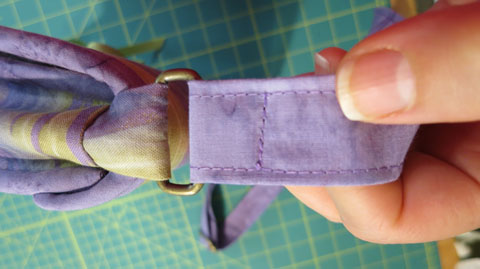
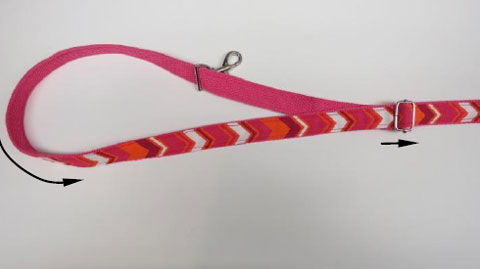
Step 2: Attach the slider to the strap

The Slider is first attached to your strap. Thread the strap through the Slider, then turn under the end and stitch in place through all layers.
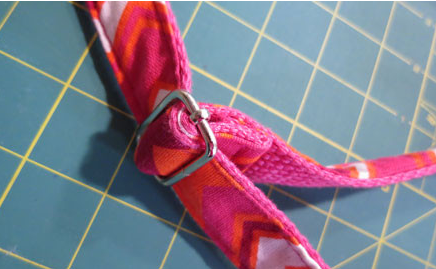
Sewing through Straps can be bulky.
Since sewing machines do not like to sew uphill, I use a Jean-a-ma-jig to start off my stitching. It goes behind the presser foot supporting the back of the sewing machine foot.
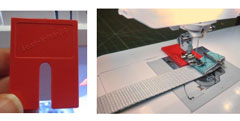
Once you have your line of stitching started you can set it aside.
Be sure to backstitch at both ends of the sewing!
Step 3: Attach the strap to the hardware
Now it’s time to attach the strap to the hardware that holds it to the bag.
Choice 1
You can permanently attach your strap to the bag by threading it through a D Ring, O Ring or Rectangle Ring.
Choice 2
Or you might want the option of removing the strap from the bag. In this case you would thread it through a Swivel Hook. The Swivel Hook hooks onto the D Ring that’s attached to the bag.
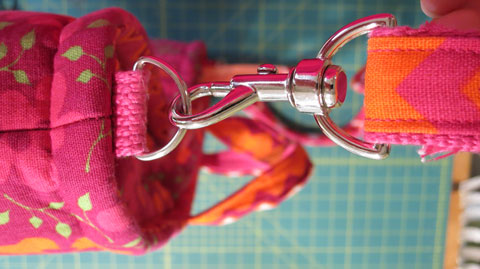
For either choice, follow along below to attach the hardware to the strap.
A. Thread the strap through the Ring or Swivel Hook as shown below.
B. Next, thread the strap through the front of the Slider.
C. Then, thread it through the ring at the other side of the bag or through the Swivel Hook.
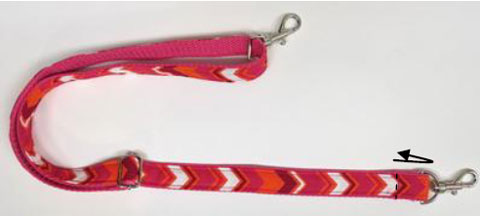
Step 4: Finish the strap and attach it to your handbag
Turn under the end of the strap and stitch in place through all layers.
If you’ve chosen the detachable option, hook the swivel hooks to the bag.
Did you find this tutorial useful? Take a video class with Brenda.

Really helpful visual directions – can now go ahead and make the straps for the unfinished bag.
This made the job so easy! Thank you so much. I didn’t have a clue where to start. Much appreciated.
Brilliant,I was putting off doing the strap but this explained it.Thank you
Very good visual instructions & easy to follow! Thank you Brenda.
Brilliant – thanks so much for this!
This is great! Was actually trying to fix the adjustable strap on my existing bag, I couldn’t find any good visual tutorials on how to do so. Thanks!
Glad to help!
Very good visual tutorial. Thank you
Perfect instructions and visuals. Really easy to follow and ‘dadah’! Strap done.
Thank you Brenda 5 star
Why, thank you! It’s nice to hear about a dahah moment!
Well good grief!! After trying and failing TWICE, with instructions ,not too clear, mind you, I googled for a how to and found YOUR instructions. Now I get it! Big “duh” moment for me. But now it’s done. Thank you so much.
Once you get your head around it, or should I say, once you get your strap around it, it’s not so bad. Glad I could help!